Developing and populating a qualitative coding framework in Quirkos
In previous blog articles I’ve looked at some of the methodological considerations in developing a coding framework. This article looks at top-down or bottom-up approaches, whether you start with large overarching themes

In previous blog articles I’ve looked at some of the methodological considerations in developing a coding framework. This article looks at top-down or bottom-up approaches, whether you start with large overarching themes (a-priori) and break them down, or begin with smaller more simple themes, and gradually impose meanings and connections in an inductive approach. There’s a need in this series of articles to talk about the various different approaches which are grouped together as grounded theory, but this will come in a future article.
For now, I want to leave the methodological and theoretical debates aside, and look purely at the mechanics of creating the coding framework in qualitative analysis software. While I’m going to be describing the process using Quirkos as the example software, the fundamentals will apply even if you are using Nvivo, MaxQDA, AtlasTi, Dedoose, or most of the other CAQDAS packages out there. It might help to follow this guide with the software of your choice, you can download a free trial of Quirkos right here and get going in minutes.
First of all, a slightly guilty confession: I personally always plan out my themes on paper first. This might sound a bit hypocritical coming from someone who designs software for a living, but I find myself being a lot more creative on paper, and there’s something about the physicality of scribbling all over a big sheet of paper that helps me think better. I do this a lot less now that Quirkos lets me physically move themes around the screen, group them by colour and topic, but for a big complicated project it’s normally where I start.
But the computer obviously allows you to create and manage hundreds of topics, rearrange and rename them (which is difficult to do on paper, even with pencil and eraser!). It will also make it easy to assign parts of your data to one of the topics, and see all of the data associated with it. While paper notes may help conceptually think through some of the likely topics in the study and connect them to your research questions, I would recommend users to move to a QDA software package fairly early on in their project.
Obviously, whether you are taking an a-priori or grounded approach will change whether you will creating most of your themes before you start coding, or adding to them as you go along. Either way, you will need to create your topics/categories/nodes/themes/bubbles or whatever you want to call them. In Quirkos the themes are called ‘Quirks’ informally, and are represented by default as coloured bubbles. You can drag and move these anywhere around the screen, change their colours, and their size increases every time you add some text to them. It’s a neat way to get confirmation and feedback on your coding. In other software packages there will just be a number next to the list of themes that shows how many coding events belong to each topic.
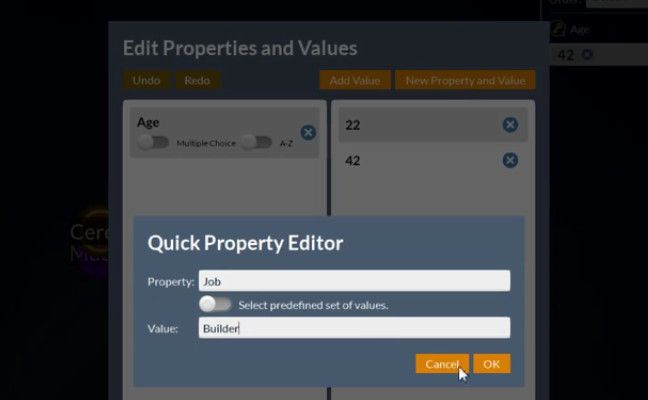
In Quirkos, there are actually three different ways to create a bubble theme. The most common is the large (+) button at the top left of a canvas area. This creates a new topic bubble in a random place with a random colour, and automatically opens the Properties dialogue for you to edit it. Here you can change the name, for example to ‘Fish’ and put in a longer description: ‘Things that live in water and lay eggs’ so that the definition is clear to yourself and others. You can also choose the colour, from some 16 million options available. There is also the option to set a ‘level’ for this Quirk bubble, which is a way to group intersecting themes so that one topic can belong to multiple groups. For example, you could create a level called ‘Things in the sea’ that includes Fish, Dolphins and Ships, and another category called ‘Living things’ that has Fish, Dolphins and Lions. In Quirkos, you can change any of these properties at any time by right clicking on the appropriate bubble.

Secondly, you can right click anywhere on the ‘canvas’ area that stores your topics to create a new theme bubble at that location. This is useful if you have a little cluster of topics on a similar theme, and you want to create a new related bubble near the other ones. Of course, you can move the bubbles around later, but this makes things a bit easier.
If you are creating topics on the fly, you can also create a new category by dragging and dropping text directly onto the same add Quirk button. This creates a new bubble that already contains the text you dragged onto the button. This time, the property dialogue doesn’t immediately pop-up, so that you can keep adding more sections of data to the theme. Don’t forget to name it eventually though!

All software packages allow you to group your themes in some way, usually this is in a list or tree view, where sub-categories are indented below their ‘parent’ node. For example, you might have the parent category ‘Fish’ and the sub-categories ‘Pike’, ‘Salmon’ and ‘Trout’. Further, there might be sub-sub categories, so for example ‘Trout’ might have themes for ‘Brown Trout’, ‘Brook Trout’ and ‘Rainbow Trout’. This is a useful way to group and sort your themes, especially as many qualitative projects end up with dozens or even hundreds of themes.
In Quirkos, categories work a little differently. To make a theme a sub-category, just drag and drop that bubble onto the bubble that will be its parent, like stacking them. You will see that the sub-category goes behind the parent bubble, and when you move your mouse over the top category, the others will pop out, automatically arranging like petals from a flower. You can also remove categories just by dragging and pulling it out from the parent just like picking petals from a flower! You can also create sub-sub categories (ie up to three levels depth) but no more than this. When a Quirk has subcategories clustered below it, this is indicated by a white ring inside the bubble. This method of operation makes creating clusters (and changing your mind) very easy and visual.
Now, to add something to the topic, you just have to select some text, and drag and drop it onto the bubble or theme. This will work in most software packages, although in some you can also right click within the selected text where you will find a list of codes to assign that section to.
Quirkos, like other software, will show coloured highlighted stripes over the text or in the margin that show in the document which sections have been added to which codes. In Quirkos, you can always see what topic the stripe represents by hovering the mouse cursor over the coloured section, and the topic name will appear in the bottom left of the screen. You can also right-click on the stripe and remove that section of text from the code at any time. Once you have done some coding, in most software packages you can double click on the topic and see everything you’ve coded at this point.
Hopefully this should give you confidence to let the software do what it does best: keep track of lots of different topics and what goes in them. How you actually choose which topics and methodology to use in your project is still up to you, but using software helps you keep everything together and gives you a lot of tools for exploring the data later. Don’t forget to read more about the specific features of Quirkos here and download the free trial from here.
